How Do You Know Seed Boot for 750 Drill Is Good
Tech Tips for Drills in No-till
The concepts for drills are really no different from planters. Some drill designs cannot adequately perform Steps ane – iv described above because they are holdovers from the tillage era. In North America, ane design that fulfills Steps 1, 2, iii, & 4 is the John Deere 750-type single-disc opener, including the 60-series (1560, 1860), 90-series (1890, 1990, 1895, 1690), and Pro-series*. Some comments to help them role:
Weights
Deere did provide for boosted suitcase weights in an intelligent location—on the box drills anyway—since they go betwixt/to a higher place the rear transport wheels. On the air drill frames, Deere was more haphazard in locating them—once again, the very best location is to a higher place/behind the rear rank (ideally, the weights would be over the transport wheels, for even greater leverage, rather than hanging off the toolbar just above the rockshaft). They should also be centered on each department equally much as possible—the weights hanging mode out on the ends of the wings cause the ends to dip unnecessarily. Weights at the front of the centre department are poorly located to provide effective downwards-force transfer (although they might take purpose in loading the drawbar while pulling a tow-behind cart). The OEM weight brackets on the wings that are ahead of the rockshaft are rather ineffective.
We've seen all manner of weights added, ranging from old tractor wheel weights, to concrete pillars and steel I-beams, and they all work just fine if they're at the back of the drill. (Some other reason you want the weight at the dorsum is keep the load off the dolly wheels at the front, which tend to sink all too easily when you practice meet a soft spot.)
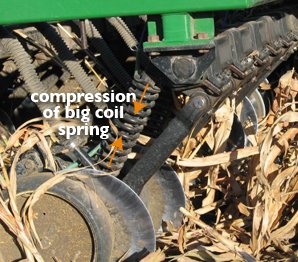
One time you have enough weight, you can hands run thehydraulic downward-force per unit area way upward into the red zone on the gauge. Equally a reminder, don't apply these gauges to compare with your neighbor—they're non even so every bit to the colour markings, etc.All that's really important is how much you've compressed the big ringlet jump on each opener. In really hard, dry conditions, you may need to shrink that jump by 2.v – 3 inches (which takes a lot of hydraulic pressure, and a lot of frame weight). This entails torquing the rockshaft so that information technology slopes downward in the back, by as much equally 15 – twenty degrees (ignore the JD owner'due south manual that says this rockshaft should be level—that's not how the drill works at all: the just fourth dimension it would be level is if you didn't demand much downwardly-pressure, i.e., tilled or unusually mellow no-till conditions). Also, don't fret besides much well-nigh the Owner's Manual alarm about bearing failure when running in the red—a keen many people accept seeded tens of thousands of acres (per drill) this way, with the bearings having good longevity. Obviously the high down-pressure puts more stress on everything (especially the torque tube itself), only the first task of a seeder is to get a adept stand up! Do what yous need to practise, or wait for a rain.
The gauge bicycle should exist firmly on the soil surface during seeding, whichholds the sidewall together while the blade exits the soil.Also for this reason, reduced inner diameter tires (RID / CIH indented gauge tire) are strongly discouraged. Assessing whether the approximate wheel is remaining firmly on the surface requires examining a length of furrow to meet that: 1) the furrow is being cut to a reasonably consistent depth, and ii) the sidewall is not blowing autonomously prematurely. This being said, at that place is a danger of excessive down-pressure level also, which causes severe sidewall compaction. That said, the vast bulk of drills we see in the field do non have enough downwardly-pressure on the openers.
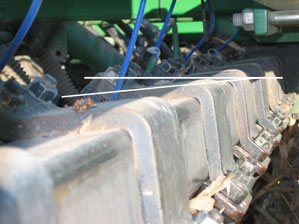
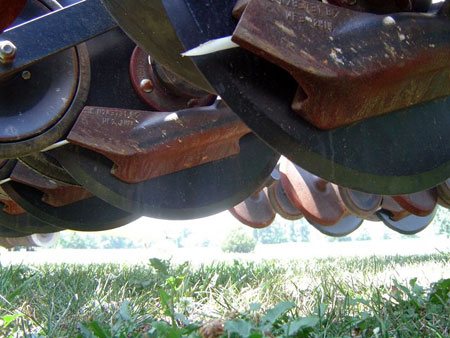
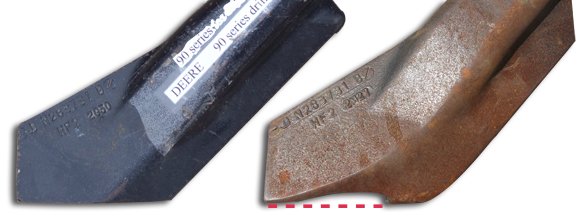
Opener blades should exist replaced before the bevel is one-half gone for optimum performance (virtually of these blades take 5/viii – 3/4″ bevel new, so when this gets down to v/16 – 3/8″, they're maximum dullness). We prefer to use corporeality of bevel remaining, rather than diameter, to determine when to replace. Dull blades require more down-pressure to cut residue and slice the soil. Worn-down blades likewise advance vesture on the seed boot & seed-boot attachment holes.
Because the exterior edge of the boot hangs out past the bract (the boot is wider than the furrow cut), information technology is very difficult to push the boot into the soil. The lower border of the boot by and large should be just skimming the soil surface—the boot shouldn't be forming the furrow, but instead keeps the loose duff layer (minor pieces of decomposable mulch) and some dust out of the furrow while the seeds drop into place. Worn blades decrease the effective depth, putting more clothing on the boot, and as well hindering the opener bract from reaching its depth (unless soils are quite mellow or tilled). If attempting to continue running worn blades, you may want to motion the seed boot to the upper mounting pigsty (render it to the middle hole when installing new blades).Exist sure to install new blades with the bevel abroad from the guess bike (worn blades are deceptive–what yous think is a bevel sometimes is just advanced wear; then don't necessarily mimic what you think you see on the drill).
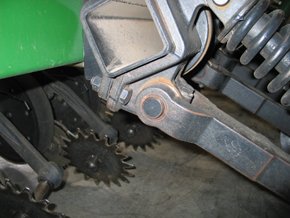
Seed-Firming Wheel

Use a narrower, flexible seed-firming ('seed-lock') wheel, such as Exapta'due south DuraLok. Older JD drills especially need to be upgraded to narrower firming wheels (JD has been making them steadily narrower with each new iteration).
Another option is the Fin from JD Skiles (ph 785-626-9338), which is a large poly sliding firmer that bolts onto the JD firming arm instead of the wheel. The Fin too has provision for liquid fertilizer routing. The Fin's seed firming adequacy is decent, only sometimes it causes residue dragging (especially north of I-70 in U.s.a.), or has less consistency of seed firming equally compared to elevation-shelf aftermarket firming wheels.
The flexible firming wheels are still the all-time choice because they can flex sideways up to 0.v-inch or more while remaining fully functional (Run into photo; if you are on perfectly level, square fields and running sub-inch guidance and auto-steer, maybe information technology's not an issue – for everyone else, information technology is.) The DuraLok stays cleaner than other designs, both for mud and vines or straw, since it has a lot of clearance betwixt the hub and the firming arm, and no exposed bolts and nuts in the hub area. The urethane fabric of the DuraLok has exceptionally good wear-life (far improve than the soft rubber on the other seed-lock wheels), and along with the narrow design, volition go thru more mud than whatever other blueprint.
You cannot beget to compromise on the seed-firming function – it is as well crucial. Narrow firming devices are vastly superior for reaching the bottom of the '5,' which is critical to their part, and also shed mud amend. Run maximum pressure on them in the bulk of weather.
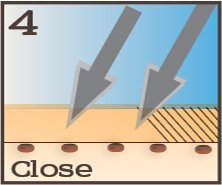
Strive to gently close the furrow, consistently breaking the sidewall and filling the furrow with loose cloth. Loose soil over the seed will slow the drying of the seed zone more than packed soil over the seed.


Source: https://www.exapta.com/working-knowledge/tech-tips-for-drills/
Post a Comment for "How Do You Know Seed Boot for 750 Drill Is Good"